Sunday, September 9, 2007

Three For You!


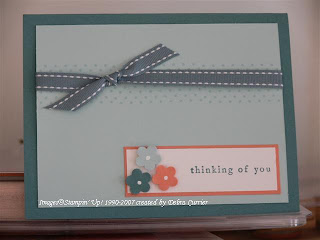
Hello again! I just wanted to show a quick and easy card after the last one. This one is so easy! Especially if you have the Three For You punch box! That is all I used on this card. Add a little ribbon and you are done!

The centers of these flowers (because you all know that all flowers must have centers) are done with the white gel pen. Brads would also be very cute in the centers but it is difficult to punch a hole in the middle and then the brad prongs tend to stick out... So, this is much easier! I also popped up the flowers using pieces of dimensionals. All of the stamps used for this card also come in the box. I have fallen in love with it and I know you will too! Have a great week everyone!

Card Recipe: Stamps- Three For You Punch Box; Cardstock- Blue Bayou, Sky Blue, Groovy Guava, Whisper White; Ink- Sky Blue, Blue Bayou; Accessories- Blue Bayou double stitched ribbon, white signo gel pen, dimensionals, flower punch (which comes in the punch box)

True Friend


Hello everyone! Hope you all had a good week! I did! I can't believe it is time to start a new week already!! But I think I am ready. Because I didn't show a project yesterday, I am going to do two posts today. I have been working on a few swaps and have some cards ready to show. Hope you enjoy!

This card is made using a stamp set from the new Holiday mini collection. This Holiday mini collection is superb!! I love almost everything in it! But I did put a limit for myself. And this stamp set was one of them!! I used the new True Friend set. The way I did this image takes a little more time than just stamping an image. The flower is all one stamp. I used my markers and colored in each section of the flower (I actually used four colors on the stamp). So, if you want quick and easy this may not be the card for you. But it still turned out cute! I normally would not think of these colors together but the color wheel made the suggestion and I went for it! And it grew on me because I made a bunch for a swap I am in! Now I just hope it grows on those who will be receiving them!! In the upper right hand corner of the rust piece is five pierced holes and two of them have gold brads in them. I know that I have used this "technique" before but I really like it! This card also uses our new Basic Gray color and I just love it!

Card Recipe: Stamps- True Friend; Cardstock- Basic Gray, Really Rust, Certainly Celery, Perfect Plum, Very Vanilla; Ink- Certainly Celery, Old Olive, Really Rust, Perfect Plum markers, Basic Gray pad; Accessories- Certainly Celery grosgrain, gold brads, Crafter's Tool Kit

Monday, September 3, 2007

Pick A Petal

Here is a card that I found on another blog - http://kimsstampinroom.blogspot.com/. I just loved her colors and layout and decided to copy! I did tweak the center just a bit. Instead of using a turqoise button (which I don't have), I took my double circle punch and punched a scrap piece of Tempting Turquoise paper. Then I took my circle punch and punched it out. And then I had a faux button! I added a little Whisper White grosgrain as well. The flower is popped up with dimensionals. Enjoy!

Card Recipe: Stamps- Pick a Petal, Curvy Verses; Cardstock- Apricot Appeal, Whisper White, Tempting Turquoise, Certainly Celery designer prints paper; Ink- Purely Pomegranate, Basic Black, Arpicot Appeal; Accessories- Circle punch, double circle punch, coluzzle, Whisper White grosgrain, dimensionals

Sunday, September 2, 2007

Coaster Frame


Hello everyone!! Well, the school year is under way and everything is going smoothly for the moment. It has just been a lot more work than I ever remember it being! But then again, I do have a 7 year old to contend with as well. Thankfully, my husband has really stepped up and helped me out there! Did I mention that I was also helping out the volleyball coach? The volleyball season ends at the same time as my son's soccer season. But then we are well on our way to Christmas!! YIKES!

Then there is stamping to help me gain my senses about me! Here is a little project that I put together for a swap and a shoebox swap that I am in. The one for the swap I did with some different paper and stamps but it is almost identical. I thought it turned out pretty cute! They are pretty easy to make as well. I used two 4 x 4 chipboard coasters (like the ones they use in restaurants). I covered them with our new Fall Flowers designer paper. Then I used the Bud Basics stamp set to decorate. Top it off with some Basic Gray taffeta ribbon and there you have it!! The little "hinges" are from a die cut by Zip 'e Mate. I just added some brads to make them look even more authentic! I really liked how it turned out! Enjoy!

Card Recipe: Stamps- Bud Basics; Cardstock- Sahara Sand, Really Rust, Basic Gray, Fall Flowers designer paper, Whisper White; Ink- Old Olive, Really Rust, Sky Blue; Accessories- vintage brads, Basic Gray taffeta ribbon, dimensionals, rhinestone brad (for middle of flower), photo corners punch, corner rounder; Other- coasters, zip 'e mate

Monday, August 20, 2007

Fun & Fast Notes


Hello everyone in blogging land! I am so sorry that it has been a while since I posted! I really want to post something new everyday and I fell a little short last week. I have started back to work (after ten years) as a 5th grade teacher. I am also helping out the coach with volleyball. And last week I had to be at school by 7 a.m. to start practice! YIKES! I know that I will have to get up that early for school but I was not prepared for that!! Anyway, we start school on Wednesday and so my posting will probably be happening in the afternoons/evenings. I will do my best to stay on top of things.

Here is a card that I just think is so sweet. This set, Fun & Fast Notes, was a set that demonstrators received for FREE at convention. We had the opportunity to take a class about watercoloring and we used this set in that class to learn all the different ways to watercolor. I wasn't sure if I liked this set but the more I use it the more I like it! It is a very easy set to watercolor! Not too much to the stamps so it is quick and easy!! When I mounted my stamps, I cut off the words on the bottom of each stamp and mounted the words to the side of the wood block. That way I could use just the image if I wanted! For this card I inked up the word thanks... with my marker for the outside and then, after cleaning the stamp, I inked up the ...I needed that. for the inside. The other thing I want to point out is that there is a small rhinestone brad in the middle of the flower. Just to give it some "bling"! Have a great week!!

Card Recipe: Stamps- Fun & Fast Notes; Cardstock- Wild Wasabi, Sky Blue, Confetti White, Rose Red prints designer paper; Ink- Black StazOn, Sky Blue, Rose Red, So Saffron, Wild Wasabi; Accessories- Rhinestone brads, blender pens, Wild Wasabi double stitched ribbon, dimensionals

Friday, August 10, 2007

From The Heart


I found this layout on another blog that I was skimming through one day (sorry I can't remember who). What caught my eye was the way the ribbon was done. Kind of non-traditional! I am always looking out for things like that! The other card had different colors and the card size was different but everything else is pretty much the same.

A couple of things about the card- One is that the stamp set does not come with leaves for the flowers. What you do is stamp the flower once for coloring and then stamp it on a green piece for the leaves. Then cut it out by cutting the extra "doodles" off. If you look real close at some of the flower petals and just cut the outside doodle part off you are left with a leaf! Isn't that clever? The flower is popped up with dimensionals. The second thing is the ribbon. I just punched a hole next to the first and last word of my greeting. Then I took my Kraft taffeta ribbon and poked it through from the top of the first word and brought it up through the second hole (last word) and wrapped it around to the back and brought it back up through the first hole. No tying need!! So clever! Well, it's different anyway! Enjoy the weekend!

Card Recipe: Stamps- Doodle This, Holidays & Wishes; Cardstock- Kraft, Rose Red, Certainly Celery, Whisper White, Rose Red prints designer paper; Ink- So Saffron marker, Black StazOn; Accessories- dimensionals, Kraft taffeta ribbon, 1/8" hole punch

Thursday, August 9, 2007

Wonderful!


This card design was one I copied from the new Fall/Winter Collection. It is 0n page 59 at the bottom. Check it out! I don't have the Pretties Kit (which is next on my list) so I substituted the flower from Looks Like Spring. I added the brads and tucked the greeting behind the flower. The flower is also popped up. The flower in the catalog is green which really bugs some people (right, Becky?). So, I changed it to Bordering Blue. I think I like the "pop" of color a little better anyway. I also didn't have any Artichoke buttons so I just used my Spring Bouquet flower punch and punched a flower center and put a brad in it! I think that a button would be really cute, though. The Artichoke piece is stamped with the Fine Lace background stamp which gives it some real elegance! Then I just pierced down the edge of the Artichoke. Enjoy!

Card Recipe: Stamps- Looks Like Spring, Warm Words, Fine Lace background; Cardstock- River Rock, Always Artichoke, Whisper White; Ink- Bordering Blue, Always Artichoke; Accessories- brads, sponge, crafter's tool kit, dimensionals

Wednesday, August 8, 2007

Friend


This is the last card that we did for make-n-takes at convention. Now I am going to have to come up with samples of my own! Uh oh!! I better get busy! I did get some new stamps from the beautiful new Holiday mini which will debut next month! But I had better focus!!

This card uses the new Happiness background stamp. The stamp has a lot of different sections on it and you can use it as one whole background or, like on this card, you can use sections of it to make it look like you had a bunch of different stamps! I am anxious to have some time to play with this stamp as it has TONS of possibilities! The flower is a chipboard flower and we took a sponge dauber and craft ink and sponged the ink on the chipboard. It is layered onto a metal edged tag. For the tag, we stamped one of the stamps from Think Happy Thoughts onto the back of the tag. Then we followed the dots on the stamp and pierced each dot so when you turn it over you have evenly spaced holes! Clever!! I just love the colors and it really went together pretty easily. Enjoy!

Card Recipe: Stamps- Fundamental Phrases, Think Happy Thoughts, Happiness background stamp; Cardstock- Kraft, Soft Sky, So Saffron, Whisper White, Wild Wasabi; Ink- Chocolate Chip, Real Red, VersaMark; Accessories- On Board Blossoms & Basics, Jersey ribbon originals, So Saffron button, metal edged tag, dimensionals, Crafter's Tool Kit, sponge dauber

Tuesday, August 7, 2007

Super Cute and Quick!


This is a 6 x 3 card that we did for a make-n-take. It will fit nicely in the open end envelopes that we sell. I don't usually make these cards (mine are always the standard) but I think that I might have to start! It's a nice size and something different! This card is so super easy!! Remember that yesterday I told you about the Build-A-Flower accents and elements tin? Well this card uses more from that tin! And another great thing... The flower is punched!! So you punch the flower with our new five petal flower punch and then you find a five petal flower from the accents and elements and stick it on top! Then we took a little label from the tin and stamped Hello! The flower has one of our new rhinestone brads and is popped up for dimension. The scalloped edge is made by removing the guide from the corner rounder and punching straight on. If you need more explanation on that please let me know. We glued some of our Cutie Pie designer paper on the inside so it would peek out and you are done! Very quick and easy and so super cute!!

Card Recipe: Stamps- Fundamental Phrases; Cardstock- Rose Red, So Saffron, Cutie Pie designer paper; Ink- Wild Wasabi; Accessories- Fairy Tale ribbon originals, Build-A-Flower accents and elements, ice circle rhinestone brads, 5-petal flower punch, corner rounder

Monday, August 6, 2007

Cards Tin


Hello bloggers! Hope you all had a great weekend! I have come down with a cold so I am still trying to shake that. But stamping and scrapbooking always makes me feel better!!

Anyway, this was probably one of my favorite projects from convention. I loved them all but I really love this one! This little tin is actually the tin that the accents and elements come in. I know that people have done things like this before but I hadn't. And since we got a in of the Build-A-Flower accents and elements they just had us use that for one of our make-n-takes. Clever! This actually was very easy to do and would make a great class. So, be on the look out for a class. I don't have cards in mine, yet. Wouldn't this be a great gift?

Let me tell you a little bit about this tin. The blue and green flowers come in the Build-A-Flower accents and elements. The flower center does as well but is on a Build-A-Brad. The Build-A-Brads are really interesting. They are bigger than our other brads and you can punch a 1/2" circle from an image or patterned paper and stick it to the top of the brad. Then you put this sticky clear top on and you've got your own custom made brad!! The bad news is that these brads are on back order as they are not meeting quality standards. Hope they get it fixed soon!!

The "C" is our new lower case monogram alphabet. I actually love the lower case more than the upper! It is stamped on our new textured cardstock. Love it! We also spelled out cards onto a label that comes in the accents and elements. As you can tell, you get a LOT of stickers in one of those little tins! I will be showing you even more in the next few days so stay tuned!

Card Recipe: Stamps- Simple Serif mini alphabets, "C" monogram alphabet lower; Cardstock- Chocolate Chip, Wild Wasabi, Blue Bayou prints designer series paper; Ink- Chocolate Chip, Wild Wasabi; Accessories- chocolate chip wide grosgrain, whisper white narrow grosgrain, build-a-flower accents and elements, pewter build-a-brad, pewter hodgepodge hardware, corner rounder, crop-a-dile, dimensionals, crafter's tool kit
Friday, August 3, 2007

WANTED!


As promised, here is the 6 x 6 page that we made at the pajama-rama event. This was made with the Outlaw designer paper and the Wanted stamp set. We also used the Sanded background (love that background stamp). I just wanted to point out the star focal point. This is kind of cool. We punched a circle out of the rust strip (the one that says wanted on it) and the background paper. Then we stamped the star from the set and used the new star punch to punch it out. Then we took the circle punch and punched a circle out of scrap paper and then centered it in the scallop punch and punched that out. Then we used the 1/8" punch and punched holes in each of the scallops. Then you take the punched star and put it on a scrap piece of Outlaw designer paper and put a brad in it and glue it behind the page to cover up your holes! I thought it came out so cute! Don't you think you need the scallop punch now?

Card Recipe: Stamps- Sanded background, Wanted; Cardstock- Outlaw designer paper, Really Rust, Sahara Sand; Ink- Chocolate Chip, Close To Cocoa; Accessories- photo corners punch, scallop punch, star punch, gold brads, circle punches

Thursday, August 2, 2007

Pocket Card


This pocket card was one of the easier make-n-take projects that we did at convention. I think that I am really going to like this new Wanted set! Tomorrow I will show a 6 x 6 page that we did with this set. This card uses the new Outlaw designer paper. I just love the colors! You can definitely dress it up to look more elegant or the stamp set can be more masculine. The rust piece fits inside the pocket which is made from a piece of the designer paper. So, you can see both sides of the designer paper - one side is the sage shadow and the other is the stripe. That's what makes our designer paper so great! On the rust card we used the crop-a-dile to emboss circles across the top of the card! I had no idea that you could do that!!! You learn so much at convention! We also used our crop-a-dile to punch the hole and set the jumbo eyelet on the pocket. The crop-a-dile is such a great tool!!! One other thing I want to point out is the new scallop punch. At convention they showed us that many of our stamp sets work so well with our punches. And this is one of them. The "medallion" piece fits exactly into the scallop punch! Hope you all are having a great week!

Card Recipe: Stamps- Wanted, Fundamental Phrases; Cardstock- Naturals Ivory, Really Rust, Outlaw designer paper; Ink- Chocolate Chip, Really Rust, VeraMark; Accessories- Chocolate Chip wide grosgrain, linen thread, pewter jumbo eyelets, corner rounder, crop-a-dile, scallop circle punch, dimensionals

Wednesday, August 1, 2007

Happy, Happy Happy!!!


Here is a little box that we made at convention. Chipboard is really "hot" right now so Stampin' Up! is really keeping up with the trends by offering quite a variety of chipboard embellishments to use for just about anything! My poor little box got a little mangled on the trip. I tried to make it presentable but I am afraid that it still has some "issues". What I really love about this little box is that the flower and the flower center are really three dimensional! I will try to explain as it might be hard to tell from the photo. We punched a hole in the box itself. Then we took a piece of cardstock with dimensionals and put it behind the hole. Then we stamped and punched out the flower center and stuck that directly to the piece of cardstock behind the hole so it looks like it is "set in". Then we took the chipboard flower and put dimensionals on it to pop it up! There is also a tiny rhinestone brad in the center. The chipboard flower does not have any paper or ink on it. It is what some might call, "raw". But it still looks great! The layers at the bottom of the box use the new Happiness background stamp that is many stamps in one! I can't wait to play with it! Have a great day!

Card Recipe: Stamps- Think Happy Thoughts, Happiness background stamp; Cardstock- Chocolate Chip, Confetti White, River Rock, Ruby Red; Ink- River Rock, Chocolate Chip, Ruby Red; Accessories- On Board Blossoms & Basics, Chocolate Chip taffeta ribbon, clear rhinestone brad, circle punches, dimensionals

Tuesday, July 31, 2007

Friends...


For the next few days I will be posting our make-n-takes from convention. The first night of convention we had a make-n-take pajama-rama party. It was so much fun! Almost everyone showed up in their pajamas (and if you didn't have any they even sold Dream Big pajamas at their Momento Mall). My best bud Kim had pajamas made for her team and was kind enough to include me! So, we had sparkly pajama bottoms and a 2007 flag t-shirt from Old Navy. I will have to get a hold of a picture to post. Kim's team's name is the Red, White and Blue Stampers (hence the reason for the kind of pajamas we wore). Anyway, when we got to the party there were tables set up for us with a water bottle and a box of Whoppers (YUM). Then we just got out our stamps and started making all the projects! We had 4 hours to do it in and it seemed to be plenty of time.

This first project I am showing is a 12 x 12 page. At convention they had these photo booths set up with people taking pictures. Kim and I had ours taken together. They took the picture in a sepia tone which is very pretty. The purpose of the photo booth was so that we could use the picture on the scrapbook page! Clever!! While I probably would never re-create this page it did turn out very cute. It is just very time consuming. I love quick and easy!! But I am glad to have it! By the way, the page is inside the front of our convention bags! We always get a convention bag and this year's bag had a "window" on the front and we could slide our page right in! Clever!! One other thing I want everyone to note are the letters. The word Friends is stamped with our Jumbo Outline Alphabet in Chocolate Chip onto the Kraft cardstock. Then we took a VersaMarker and just colored inside each letter! Clever!! As you can see and will continue to see, I learned a lot of "clever" things at convention! Enjoy!

Page Recipe: Stamps- Jumbo Outline Alphabet; Cardstock- Kraft, Rose Red, Wild Wasabi, Bashful Blue, So Saffron Prints designer paper; Ink- Chocolate Chip, VersaMarker; Accessories- Build-A-Flower accents & elements, pewter build-a-brad, Wild Wasabi double stitched ribbon, natural hemp, 5-petal flower punch, photo corners punch, circle punches, dimensionals, staples

Monday, July 30, 2007

Simply Said


O.k. Here is my third and final swap card for convention. I did come back with about 10 of these that didn't get swapped out. But I am sure that I will find someone to give them to! I know that I can cut the wasabi cardstock just a bit and then mount it onto a white card to be able to mail it to some of my closest friends. This was a last minute card! I came up with it on Monday and I left Tuesday! I did finish them all up by Tuesday night so they were ready to swap on Wednesday!

Convention was so much fun this year! I am sad that it is over but I am excited for next year! Want to join me in Salt Lake for three wild and crazy days of stamping fun? Be sure to ask me how you can get there! Keep checking back as I will be loading the make-n-takes from convention.

This card layout is actually copied from one of our inspiration sheets - Lively Leaves. I just loved the layout! It is so simple! The stamp set isn't a new one but the colors are. If you would like some inspiration sheets (as I have a ton of them), be sure to ask me how to get some!!

Card Recipe: Stamps- Simply Said; Cardstock- Wild Wasabi, Purely Pomegranate, Bashful Blue, Confetti White; Ink- Wild Wasabi, Bashful Blue, Purely Pomegranate, Black stazon; Accessories- Light Blue gingham, gold brads, dimensionals, blender pen, corner rounder

Tuesday, July 24, 2007

Convention Swap Cards


As promised, I am posting my convention swap cards. I actually have one more but didn't get a picture of it and my camera is loaded up! I will post it when I get back. I am so excited! The first card is a card you may well recognize. Well, the layout anyway. Check a few posts back - Doodle This. Same layout! I just loved it so much! On both cards I used the Crafter's Tool Kit - piercing pad, piercer and template - to make the five holes on the top right hand side and then just put in two brads in every other one. I had seen this idea on another card I had received from a swap and just loved the idea! That same idea is used on the Heartfelt ATC (artist trading card). The ATC idea came from that same swap card. I just love the color combination! The Christmas card turned out better than I would have thought! I actually copied the layout from the new Fall/Winter Collection catalog! Check it out. It's on page 142! I did add the brads. I am into a "gotta have brads AND ribbon" mode! On my convention card I used silver brads because I didn't have enough black brads. And check out the Christmas tree. I used one of Kim's inventive techniques - Punched Confetti! The stamp has dots on the tree. So I got out my 1/8" and my 1/16" punches and punched out the dots. Then I backed that piece with pomegranate so it would show through! Thanks, Kim for such a great idea!!

Remember, I won't be posting again until next week! But be checking often for some great ideas! Have a great week!!

Card Recipes: (Flower card) Stamps- Flowers & Flourish; Cardstock- Groovy Guava, Wild Wasabi, Sahara Sand, Basic Black, Whisper White; Ink- Groovy Guava, Wild Wasabi, Basic Black; Accessories- Black gingham, black brads, Crafter's Tool Kit, dimensionals

(Flower ATC) Stamps- Heartfelt Thanks, Itty Bitty Backgrounds; Cardstock- Pumpkin Pie, Not Quite Navy, Old Olive, Whisper White; Ink- Pumpkin Pie, Old Olive, Not Quite Navy; Accessories- Crafter's Tool Kit, Pumpkin Pie grosgrain, Not Quite Navy brads

(Christmas Card) Stamps- Year After Year, Happy Everything; Cardstock- Old Olive, Purely Pomegranate, Basic Black, Kraft, Confetti Cream; Ink- Black StazOn, Old Olive, Purely Pomegranate; Accessories- Crafter's Tool Kit, silver brads, black gingham, dimensionals

Monday, July 23, 2007

A Groovy Flower


Well, convention is just a few days away! I actually will be leaving tomorrow and convention starts on Wednesday!!! I can hardly wait!! I am leaving tomorrow with my good friend, Kim and we will be taking a little detour to Ft. Collins to visit a wonderful scrapbooking store!! It is one of our favorites (after Country At Heart of course). I am sure that we will be finding some "goodies" to play with! So, I will try to post one more card tomorrow morning before I leave but then I won't be able to until next Monday. Then I should have some wonderful new ideas to show!!

This card is one that my wonderful friend, Becky helped me with. I was stumped on how to make this card come together - Thanks, Becky! I got to use my cool new tool, the crop-a-dile! It is so awesome!! It punches paper (and thick paper or cardboard) SO easily!! And it sets eyelets with ease and no noise! I love that tool!! The jumbo eyelets are new as well. Love those, too!! This card is actually for a swap I am in at convention. We were supposed to use the Pick A Petal set and here is what I came up with! Enjoy!

Card Recipe: Stamps- Pick A Petal, Curvy Verses; Cardstock- Blue Bayou, Whisper White, River Rock; Ink- Blue Bayou, Groovy Guava, Not Quite Navy; Accessories- Blue Bayou double stitched ribbon, antique brass jumbo eyelets, dimensionals, 3/4" circle punch

Thursday, July 19, 2007

Doodle This!!


Good morning everyone! Hope your day is special! I have an interview today so I am going to make this quick.

Here is a layout that I copied from my good friend Becky. Thanks, Becky! She has an awesome card class every month that I am privileged to be a part of. While she doesn't use Stampin' Up! products, I still get so many wonderful ideas from her class! And this is one of them. Actually, this was a card they had done before I was a regular. But when I saw it I loved it! So, I had to figure out how to use the layout with Stampin' Up! products! And this is what I came up with! The stitched ribbon on this card has been discontinued but black gingham would be perfect as well! I have also copied this layout for my convention swap card! I used a different set and colors but the layout is practically the same! Enjoy!

Card Recipe: Stamps- Doodle This, Much Appreciated; Cardstock- Ruby Red, Old Olive, Creamy Caramel, Basic Black, Very Vanilla; Ink- Black StazOn, Old Olive, Basic Black; Accessories- Watercolor Wonder Crayons, ribbon, vintage brads, Crafter's Tool Kit, dimensionals

Wednesday, July 18, 2007

Recognize This Card?


Well, do you? Just check the card from yesterday! Same one!! Well, actually it is the same layout. Cool, huh!! I love doing that! Like I said yesterday, the layout is copied from a Stampin' Success magazine that I get once a month because I am a demonstrator. I told you it was way cool to be a demonstrator! When I find a layout I just love I want to find other stamps and images that will fit the layout and make more in many different colors! Kind of like finding a shirt that looks really good on you and it is so comfortable that you buy that same shirt in every color! I think it is fun to combine different colors together (of course I use my color wheel for help). I hope you enjoy this card, again. Thanks for stopping by!

Card Recipe: Stamps- Baroque Motifs; Cardstock- Blue Bayou, Mellow Moss, Bravo Burgundy, Kraft; Ink- Bravo Burgundy, Blue Bayou; Accessories- sponges, brad, Bravo Burgundy grosgrain, slit punch, Crafter's Tool Kit, dimensionals

Tuesday, July 17, 2007

Friend Card


Hello everyone in blogger land! I just finished looking through the NEW upcoming Holiday mini catalog from Stampin' Up! Stampin' Up! has posted it on their website so that demonstrators can go look at it! We will get to order from it starting August 1 and the public will get to order starting September 1. It's so fun to be a demonstrator!!! I just love those sneak peeks! Anyway, it is just wonderful! I had to make my wish list already and now I have to decide what can wait and what I have to have at once!! I can't wait to share with you all what is in it!

My friend card today is one that I pretty much copied from a Stampin' Success magazine. They had used a different stamp set but I believe the colors are the same. The thing that I just realized is that the background stamp that I used is no longer available. So sorry! But not to worry as many of our wonderful background stamps would work in its place!! Also, there are two jumbo wheels that coordinate with this set that would be perfect as well! The chocolate 1/4" grosgrain is not available but it is in the 5/8". That might seem too big but there is the Chocolate Chip taffeta that would be great to use. Love that taffeta!! Enjoy!

Card Recipe: Stamps- Everyday Flexible Phrases, Simply Said; Cardstock- Chocolate Chip, More Mustard, Bordering Blue, Confetti White; Ink- Chocolate Chip, More Mustard; Accessories- Crafter's Tool Kit, slit punch, Vintage brads, ribbon, sponge, dimensionals

Monday, July 16, 2007

Ready To Swing?


These are pictures of a swing card that I made for a swap that I was in. I took some different pictures so you could get the idea of what a swing card is and maybe even how it works. I really enjoyed making these and it isn't too difficult to do! I may have to try and put the directions on my blog one of these days. I like it, too, because the size is the same as a regular card and will fit inside the envelope very easily! When I first made this card I had used the Ivory narrow organdy ribbon. Well, Stampin' Up! no longer sells organdy ribbon wide or narrow any longer. So, I purchased some of our new taffeta ribbon and OOOOOHHH! I do love that new taffeta ribbon! It is so pretty!! I just can't wait to have all the beautiful new colors!!! I don't know if you can tell, but I did some piercing on the River Rock piece in front of the word kind (......kind). When you make this card you have to remember that the front panel (in this case the chocolate chip piece) will hide some of the main image so you have to "scoot" it over so it will show when the card is closed. I also sponged the River Rock piece. The main image is popped up and I added a few brads. Thanks for stopping by! Have a great day!

Card Recipe: Stamps- Baroque Motifs; Cardstock- Chocolate Chip, River Rock, Old Olive; Ink- Chocolate Chip, River Rock; Accessories- Very Vanilla taffeta ribbon, gold brads, Crafter's Tool Kit, dimensionals, sponge, paper trimmer (cutting and scoring blades)

Friday, July 13, 2007

Pick a Petal


Hello Everyone out there in the blogging world! I have been busy cleaning out and up my stamp room! YIKES! What a real mess it has been!! So messy, in fact, that it was impossible to "play". That's when I knew there had to be a change. So, instead of playing with new "toys" I got out trashbags and boxes (to start organizing) and made some room on my work table. You can actually see it now! And when I walk in I actually smile!! I can't wait to get it finished. But I think I might have to take some time to play today. I am having withdrawls!!

Today's card is using the new Pick a Petal stamp set. I also used the white gel pen to create those white lines on the guava piece (or as my good friend Sherry calls them, "Those stinkin' black/white lines!"). Maybe this will be our make-n-take at the convention get together! What do you think Sherry? I also created the scalloped border using my corner rounder with the guides taken off. With a little practice it is easy to do! Even my son has been practicing making scalloped borders! Enjoy!

Card Recipe: Stamps- Pick a Petal, Hugs and Wishes; Cardstock- Blue Bayou, Sky Blue, Groovy Guava, Whisper White; Ink- Groovy Guava, Blue Bayou; Accessories- White grosgrain, white gel pen, dimensionals, sponge, corner rounder

Thursday, July 12, 2007

Flowers & Flourish


Well, it's really cloudy today so I hope that the picture took o.k. I hate using a flash so I took one outside. Anyway, this is the new Flowers & Flourish stamp set! This was the stamp set that demonstrators received FREE on the FREE cruise that we can earn. No, I didn't earn the cruise but one of my downline did and she let me borrow her set - Thanks, Emily!!

I got the idea for this card from the catalog's Simply Sent kits - Friendship Shapes. The color choices came from one of our new Simply Scrappin' kits. Keep browsing through the catalog for many wonderful color choices and card ideas!

I am also using this set to do my swap cards for convention. I am not going to post that card until after convention. I want it to be a surprise!! Thanks for stopping by!

Card Recipe: Stamps- Flowers & Flourish; Cardstock- Taken With Teal, Sahara Sand, Basic Black, Old Olive, Rose Red Prints paper; Ink- Taken With Teal, Basic Black; Accessories- Silver brad, black gingham ribbon

Wednesday, July 11, 2007

I'm Baaaack!!!


Yes, I am back!! Did you miss me? It's always good to be home but I sure do miss my family! I know my husband is glad to have us home!! Anyway, it was so much fun and my mom and I had a great time going through the catalog over and over and over again!! We even found some time to do a little stamping! I had wanted to visit some scrapbook stores while I was there but we just ran out of time. So much to do!

As promised I am now showing samples made only with product from the current Fall/Winter Collection catalog. This one is a card I made for a recent swap I was in. I used the layout from a card I saw in a Cards magazine. It is actually very simple to make and looks really great! Don't you think? I have a list of card ideas that I am wanting to try so I hope they turn out o.k. so I can post them! Thanks for looking and have a great day!

Card Recipe: Stamps- Year After Year, See You Around jumbo wheel; Cardstock- Sky Blue, Wild Wasabi, Purely Pomegranate, Groovy Guava, Whisper White; Ink- Black Staz On, Sky Blue, Wild Wasabi, Groovy Guava; Accessories- silver brads, dimensionals, blender pen

Monday, July 2, 2007

Let's Get Sassy!


Happy July! I will be leaving for vacation today and will be back a week from tomorrow! I am so excited to be able to go and see my family! And where they live, we will be able to have some fun with the fireworks!! My son is so excited about that! Anyway, I won't be posting anything until I get back so don't write me off!!

This card doesn't use anything really new but everything on it is current! I was looking at some of the cards I had made using new stamps but some of my accessories were discontinued so I am waiting for my first order to arrive to change out some of those accessories. What is new on this card is the name of the ribbon. If you have the turquoise grosgrain ribbon then you have the same color. Stampin' Up! just changed its name to Tempting Turquoise to match our color names. Clever! I did copy this card from last year's catalog. So bright and cheery! Looks like summertime! Thanks for stopping by!

Card Recipe: Stamps- Sassy Stems; Cardstock- Gable Green, Only Orange, Tempting Turquoise, Confetti White; Ink- Tempting Turquoise, Only Orange, Green Galore stamp pads; Accessories- Blender Pen, Tempting Turquoise 1/4" grosgrain, dazzling diamonds glitter

Friday, June 29, 2007

Last Post of 2006-2007 SU! Year!


My new catalogs finally arrived!!!! I have a very wonderful friend (well, actually, I have many wonderful friends - believe it or not) who gave me one of her catalogs yesterday morning! Isn't that just so nice of her? And while our kids were in skateboarding lessons, we sat in the car and looked through it! WOW!!! If you want your copy of the new 2007-2008 Fall/Winter Collection then call me to reserve your copy. So, this will be my last post of the 2006-2007 Stampin' Up! year. Next time you browse my blog I will be uploading samples that will be from the new 2007-2008 catalog! I am so excited!!

This card uses the Big Blooms stamp set that is in the current Spring Mini catalog (which expires tomorrow). It also uses the new Prints designer paper (I learned that it is officially called "Prints" designer paper and comes in a large variety of beautiful colors). Enjoy!

Card Recipe: Stamps- Big Blooms, Much Appreciated; Cardstock- Almost Amethyst, Certainly Celery, Whisper White, Rose Prints designer paper; Ink- Rose Red, Certainly Celery; Accessories- Sweet Shop ribbon originals, dimensionals, saffron brad

Thursday, June 28, 2007

New Catalogs To Be Here Soon!!!


Well, I am in great anticipation as I expect my catalogs to arrive sometime today!! So, if you don't hear from me for a while you will know what I am doing!!! I will still try to post but...

This set is Big Blooms which will not be in the new catalog. However, there is anther set that is in there (haven't seen it yet) that I think that I must have! And I think it will be very comparable to Big Blooms. This card does use the Palette O' Prints designer paper that will be in the new catalog. And that designer paper will be available in many other colors as well. Enjoy!

Card Recipe: Stamps- Big Blooms; Cardstock- Brocade Blue, Regal Rose, Whisper White, So Saffron designer paper; Ink- Regal Rose; Accessories- White, Rose and French Blue grosgrain, Brocade Blue brad, dimensionals

Wednesday, June 27, 2007

Office Accoutrement Tab Book


This is a little book that I put together using the Office Accoutrement set from the Spring Mini catalog. From what I can gather from the "chatter" about the new catalog, this set did make it!! I love all the little office type stamps AND there is designer paper to match as you can see. Another wonderful product that coordinates is the Little Reminders Accents & Elements tin full of beautiful die-cuts and stickers! I didn't use the accents & elements on this book. I also LOVE the new Round Tab Punch! What fun I am having with this one! I will have to post sometime all the cute things that you can make with that punch. It's not just for making tabs! Enjoy!!

Card Recipe: Stamps- Office Accoutrement; Cardstock- Cool Caribbean (retiring), So Saffron, Taken With Teal, Certainly Celery, Chocolate Chip, Whisper White, Notations double sided designer paper; Ink- So Saffron, Chocolate Chip, Cool Caribbean (retiring); Accessories- Chocolate grosgrain, Cream grosgrain, Celery grosgrain, vintage brads, round tab punch, sponge, dimensionals

Tuesday, June 26, 2007

Petals & Paisley Tea Bag Holder


This is a little tea bag holder that I had made for a 3-D swap I was in. I got the idea and instructions from one of my earlier Stampin' Success magazines. It is really easy to do! I got the word that this stamp set will be in the new Fall/Winter Collections catalog! Being a demonstrator really has its perks! All demonstrators got this set at Christmas time as a Thank You from the company! Now wasn't that nice of them? I thought so!! Then it appeared in the Spring mini catalog along with other coordinating sets and double sided designer paper!! I just LOVE their designer paper!!! And, yes, the designer paper will be in the new catalog as well! Thank goodness! Because they are discontinuing all of their other designer paper! And that's after I finally collected it all!!! LOL!! Enjoy!

Card Recipe: Stamps- Petals & Paisley; Cardstock- Old Olive, Rose Red, So Saffron, Whisper White, Petals & Paisleys designer paper; Ink- So Saffron, Rose Red, Old Olive; Accessories- Cream grosgrain, gold brad, dimensionals, sponge, circle punch, gold cord (retiring), tea bag.

Monday, June 25, 2007

Big Blooms


Well, the word is that there are people receiving their new catalogs!!! That means only one thing... they are out there and on their way to me!!!!! I can hardly stand it!!! But I must wait. So, I have been reading and making a wish list based on what I read! I am sure that I will be adding to that after I see the actual catalog! Anyway, the set that I used for this card, Big Blooms, is not in the new catalog. I really love this set! So, yes, I am bummed. However, it could make it into the Spring/Summer catalog. We will just have to wait and see. But, from what I am reading, there is another set that I am anxious to get my hands on!!! The accessories just sound so wonderful!! UGH! I wish it would hurry up and get here!!! Is anyone else excited?? O.k. O.k. Let's focus here.

This card does use a new product that will be in the new catalog. The Palette O' Prints designer paper. Demonstrators had the opportunity to pre-order it (and there was a special for customers, too) in four different colors. In the new catalog there will be many more colors added. It is double sided and very beautiful! I also want to thank Becky for the great card layout! I am in her card class at her wonderful store and I get a lot of my card layouts from the cards we do in her class! Enjoy!

Card Recipe: Stamps- Big Blooms, Warm Words; Cardstock- Rose Red, Pretty In Pink, Whisper White, Rose Red Palette O' Prints designer paper; Ink- Rose Red; Accessories- Pretty In Pink brads, pink grosgrain.

Friday, June 22, 2007

Sketch It (Retiring? Yes!)

Sketch It has been with me for a LONG time! This set was a free one to demonstrators who attended convention (I can't remember how long ago - well, I guess I could figure it out but that would take me too long). I have used and used this set. You can do so much with it! The Flower can be a Christmas wreath, or a bright cheery flower or as in this case, a sunflower! It just has so many possibilities! And with the words that come with it make it easy for you to create a card for any occasion! I copied this layout and color combination from a card that someone had sent to me. Her card used an actual sunflower stamp. I didn't have one so I had to improvise.

One thing to note on this card is that I used our In Colors. Stampin' Up! came out with 6 new colors for the 2006-2007 year. Each year they will come out with a new set of 6 In Color colors. Which means that the 2006-2007 In Color colors will be retired. I have really fallen in love with these colors. But the new ones are just as beautiful! I can't wait to really play with them and find even more color combinations!! The 6 In Color colors that will be retired are- Marigold Morning, Cranberry Crisp, True Thyme, Cool Caribbean, Buckaroo Blue, Vintage Violet. So be sure to get your colors ordered before they are gone!! Thanks for looking!

Card Recipe: Stamps- Sketch It (retiring), Rough Texture jumbo wheel; Cardstock- Marigold Morning, True Thyme, Cranberry Crisp, Very Vanilla; Ink- Marigold Morning, Cranberry Crisp, True Thyme, Close To Cocoa; Accessories- Twill Tape, mustard brad, sponge, dimensionals

Thursday, June 21, 2007

Petal Prints (You Guessed it - Retiring)


Are there any sets that Stampin' Up! is going to keep? Very few but like I always say, Stampin' Up! has never disappointed me! I am so excited to see the new Fall/Winter Collection that I can hardly stand it!!! But, all I can do is wait. (sigh) Anyway, this card is one that I copied exactly from one of our wonderful Stampin' Success magazines. Stampin' Success is a monthly publication for demonstrators. It is all in color so you can see the wonderful creations that they come up with. It is so beautiful!! Not only is it filled with glorious samples that can be done at workshops or classes but it is also filled with ideas to get your business going from sales to recruiting! I think that people should be a demonstrator based on this publication alone!! So, when I saw this card I knew that I could use it as a make-n-take at my workshops.

For this card I used a watercolor technique with our Watercolor Wonder Crayons. I used the Old Olive and the Real Red WW crayon and colored directly onto the stamp (olive for the stem and red for the flower). Then I lightly sprayed the stamp with water (not too much). Then stamped onto the watercolor paper. Watercolor paper works best for this technique as it absorbs the water better than the Whisper White. And there you have it! I just love how the WW crayons are the same colors as our pads, markers, paper, etc. Everything just coordinates wonderfully! No thinking required! Enjoy!

Card Recipe: Stamps- Petal Prints (retiring), Much Appreciated and Leaf Prints wheel (not retiring), Cardstock- Old Olive, Real Red, Barely Banana, Watercolor Paper; Ink- Old Olive; Accessories- Silver brad, Watercolor Wonder Crayons, sponge

Wednesday, June 20, 2007

Sick of "Another Retiring Set"?

I just read my posts and had to laugh at the titles "Another Retiring Set". Boy am I creative or what? But since I just started my blog I wanted to get these cards posted somehow in their glory. I enjoyed making them and I wanted to show them off. So, for the next week or so (or maybe I will get sick of it before then), I will be showing cards with retiring sets. I am working on new stuff, too. So, be sure to keep checking! Thanks for looking!!

Artifacts - Another Retiring Set


Well, the retiring accessories list just came out. OUCH!! I can't believe some of the things on that list! I know that they say that some of the items will come back but packaged differently. Change is hard but I just keep telling myself that there will be some really great stuff in the new catalog!! And I just got a notice that they were shipped!!! WAHOO!! If you want yours be sure to let me know so that I can reserve your copy! I am sure that they will go fast when I do finally get them!

This card uses one of my favorite more "manly" stamp sets. I loved using the Artifacts for more masculine style cards. And this layout was actually copied from the 2006-2007 Idea Book & Catalog! It is on page 15. Enjoy!

Card recipe: Stamps- Artifacts (retiring), Rough Texture jumbo wheel (not retiring), Sincere Salutations (not retiring); Cardstock- Always Artichoke, Saraha Sand, Bravo Burgundy, Basick Black; Ink- Bravo Burgundy, Always Artichoke; Accessories- Crafter's Tool Kit, black brad, dimensionals

Tuesday, June 19, 2007

Another Retiring Set... Flower Filled


Flower Filled is a stamp set we got FREE for attending convention 2005! Just one of the great perks for being a Stampin' Up! demonstrator!

This card is one that I totally copied (color and layout) from the 2005-2006 Idea Book & Catalog. Remember to order your retiring sets before it's too late!

Card Recipe: Stamps- Flower Filled (retiring), Much Appreciated (not retiring); Cardstock- Whisper White, Apricot Appeal, Certainly Celery, Lavender Lace; Ink- Apricot Appeal, Certainly Celery, Lavender Lace, Basic Black

There were no accessories used on this card but I think that I would/should have put a brad in the flower center. As my friend Becky always says, "All flowers need a little something in the middle." Thanks Becky!! I do think that she is right! But it is also nice to know that you can make a nice card without so many products.

Monday, June 18, 2007

The Value of the Catalog


If you love the set Love Ya Bunches then you need to purchase it before June 30th (or forever hold your peace)!! This is such a fun set and will be retired after June 30th. I wanted to show you this card because I copied the layout straight from the 2006-2007 Idea Book & Catalog. I loved the layout so I just changed the colors and the stamp set. This card is on page 94. If you find a layout or color combination that you love from the catalog (or other resources) then use it! You don't need to reinvent the wheel! I love to get inspiration from the catalog and I do it all the time! So, I highly encourage you to get your catalog out (or if you don't have one ask me how you can get one) and start copying!

Card Recipe: Stamps-All God's Children, Canvas background; Cardstock- Old Olive, Ballet Blue, Pumpkin Pie, Whisper White; Ink- Basic Black, Pumpkin Pie, Ballet Blue, Old Olive; Accessories- chocolate grosgrain, blender pen, crafter's tool kit.

Retiring Stamps!


On June 30th, many of Stampin' Up's 2006-2007 stamp sets will be retiring. While I am sad that many of them are going, I am so excited about the upcoming 2007-2008 Idea Book & Catalog! There will so many new and wonderful stamp sets and accessories to look at and enjoy!! I have decided to start my blog with a last look at some of those sets that will be retiring. If you are wanting to get your hands on these sets, you need to have your order to me before June 30th! If you would like to reserve your copy of the new 2007-2008 Idea Book & Catalog please let me know as soon as possible. Enjoy!

*Card Recipe: Stamps- All The Best (retiring), Sincere Salutations (not retiring); Cardstock- Not Quite Navy, Perfect Plum, Mellow Moss, Whisper White; Ink- Perfect Plum, Not Quite Navy; Accessories- Moss grosgrain, dimensionals, Not Quite Navy brad

New Adventure

Welcome to my new blog! This is a new venture for me and I am very excited about it! Please feel free to let me know what you think. Thank you very much for looking and enjoy!